
the following images are from the book Color Drawing by Michael E. Doyle


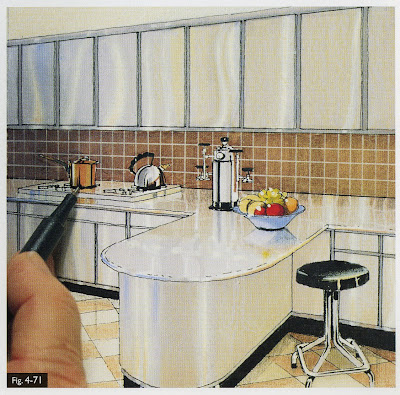
in this image they are using a paint brush to make white highlights, a paint pen would do this as well

shading a shadows are what give your rendering depth, use your grays as well as graphite


 these are showing how to do your renderings in steps and use a gradient to create reflective surfaces

 this is showing the importance of colored pencils
helpful pointers :
• test colors on the same kind of paper that you will be using.
• do lighter colors first, you can go darker, but not that much lighter.
• (going over lighter colors with a gray is a good way to gradually darken colors.)
• you don't have to use markers alone- try graphite underneath/on top, and color pencils on top (going over colored pencil with markers will ruin them, the wax clogs the tip.)
• a white paint pen can also be used to help make highlights
• use a slip sheet. the marker may bleed through, so you will want a barrier to protect the paper or surface underneath your drawings.
• save old markers. they can be used for shading as a ‘dry brush’ appearance in your drawings.
• marker paper has two sides. make sure you are rendering on the correct side for a smooth appearance.
• store markers horizontally, especially with prismas (prevents drying out of the two tips).
• prismacolor-
• pros: dry marker. allows for a more detailed line
• triple tip allows surface variety
• cons: difficulty maintaining a ‘wet edge.’ wait too long, and the added color will cause bleed lines and overlapping
• chartpak-
• pros: wet marker. cover larger areas
cons: bleeding
No comments:
Post a Comment